In the store, people who want to buy a mountain bike often choose the complete option because they like the look or the features it has. However, customized mountain bikes can appeal to individuals who would like to narrow down their choices and create a perfect bike for themselves.
The following instruction manual with easy-to-follow steps and illustrations will help novice bike-lovers, amateur mountain bikers, and extreme sports enthusiasts to assemble a bike easily and quickly. The readers should prepare the tools and supplies indicated below and follow the steps to get their new bike ready for the ride.
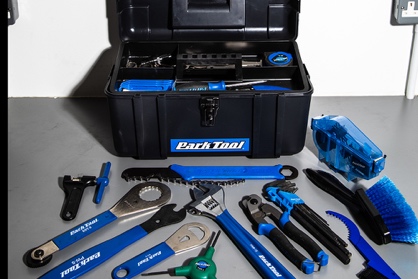
List of Tools and Supplies
- Rim tape;
- Cassette lockring tool;
- Bottom bracket tool;
- Chain breaker;
- Chain control;
- Crown race setting tool;
- Grease or lubricant;
- Hex wrenches;
- Screwdriver;
- Torque wrench (optional);
- Hacksaw.

The Steps
- Use the rim tape to firmly fix the tires to the wheels and utilize the screwdriver to safely and symmetrically install the rim strip.
- Connect the cassette with the rear wheel. Remember that the gears of the rear wheel, called cogs, should be installed in a fixed order: the large ones first and the small ones last.
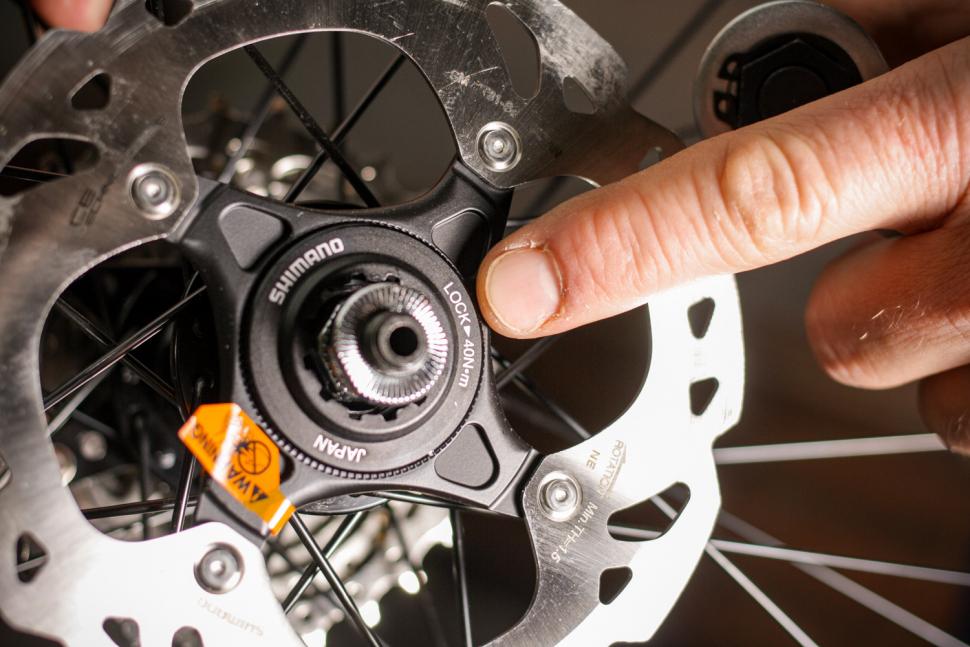
- Attach the rotors (devices used to stop the bike by creating friction against the brake pads) following the arrow indicators on the disc brake. Mind the differences between six-bolt or centerlock rotors: the former requires screwdriver tightening, while the latter needs a lockring tool or a torque wrench.

- Find the clamp to your bike seat, position it in a way that it enters the frame slot, and connect the frame with the seat post. To facilitate the process, use oil for metal-based bikes and gel formulas for carbon bikes.
- Install the threaded bottom bracket by placing the right bracket halfway into the frame, followed by the left one, and tighten with the bottom bracket tool. Remember to apply the lubricant (or grease) on the metal frame to prevent corrosion.
- Press the crown race against the steerer tube, apply grease on the headset cups, align each cup, and finish with the top cap.
- Tighten the complete headset and make sure that its parts are in place and do not move freely.
- Place the handlebar stem (a component connecting the handlebars with the steerer tube) in the stem clamp, position it at your preferred angle, attach the handlebars, and tighten the bolts of the top cap.
- Install the shifters (or shift levers) by placing them firmly on the handlebars and cut the derailleur cable housing with the wire cutter or saw to fit with the hacksaw.
- Apply some alcohol-based lubricant on the handlebar grips to help them slide easily and push them on the handlebars.
- Attach the front and rear wheels by connecting the skewer with the hub and align the axle (a rod) with the small metal slots on a drive side, called dropouts.
- Install the disc brakes by placing them on the attachment point (or mounts) of the frame and using the screwdriver to firmly fix and tighten them.
- Thread the chain through the derailleur cage, figure out the perfect length, cut to size with the chain breaker, and link the ends of the chain.
- Adjust the front derailleurs by positioning them to the lowest-limit screw and aligning them to reach the lowest gear. Complete the same steps with the highest-limit screws and gears and try shifting between the gears.
- Carefully inspect the bike and check the results.
Tip: Organizing all your bike parts, tools, and supplies beforehand makes the process of assembly and installation smoother and easier.
References
Loretz, J. (2020). Direction indicators on a disc brake. Road. Web.
Milner, D. (2021). Tools and supplies. Mountain Bike Rider. Web.