Introduction
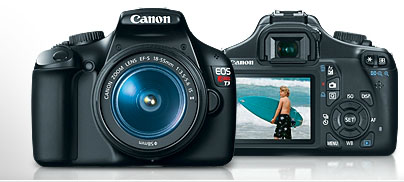
Canon EOS Rebel T3/1100D is a high-performance, digital single lens reflex camera. It is fitted with a fine-detail CMOS sensor with a megapixel of 12.2. The camera has a DIGIC 4, high precision and high speed 9 point AF. It addition, it has approximately 3fps continuous shooting. More features of the camera are live view and high definition (HD) movie shooting.
Getting Started
This section explains the necessary steps to be followed before you start using the camera.
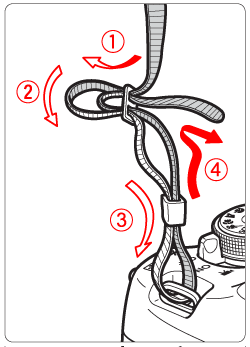
Fastening the Strap
Fix the strap to help you carry the camera around. Insert the end of the band through the strap mount hole. You should do this starting from the bottom. Then hook it into the buckle as illustrated in the figure below. After that, pull the strap up to tighten it to the buckle.
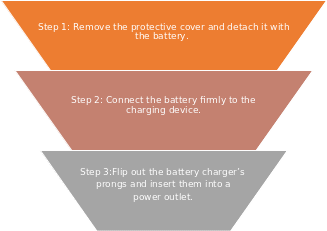
Charging the Battery
Follow the steps below when charging your battery:
Note: – It takes approximately 3 hours to fully recharge a completely exhausted battery. Recharging in low temperatures (6oC – 10o C/ 43oC – 50oC) will take up to 4.5 hours.
- When fully charged, the charge lamp with turn green.
Turning on Power
Table 1: Turning the camera on and off
Note: To reduce power consumption and increase battery life, the device is designed to go off automatically after 60 seconds of non-use. To switch back on, flip the shutter button once.
Attaching and Detaching Lens
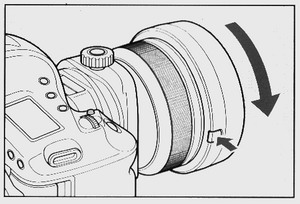
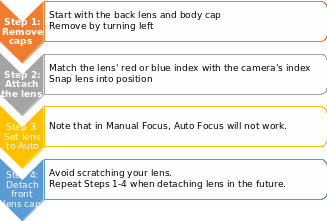
- Remove the caps.
Start by detaching the back lens lid and the body cap. Do this by turning them to the left as shown in the picture below.
- Step 2: Attach the lens.
Match the lens’ red or blue index with the camera’s index, making sure to match the colors. Turn the lens to the right until it snaps into position.
- Step 3: Set the Auto mode on the lens
If the mode is manual focus (MF), autofocus feature will not work.
- Step 4: Remove the front lens cap
The figure below is a graphical representation of the steps:
Basic Operation
Adjusting the Viewfinder Clarity
- Turn the knob left or right until the viewfinder points appear sharp to the eye.
Holding the Camera
To obtain a sharp and clear image:
- Put one hand around the device and hold tightly.
- Grip the underside of the lens with the other hand.
- Flip shutter button lightly with the index finger.
- Maintain a stable stance to stabilize the camera and the image.
- Press the camera against your face and look through the view finder.
Taking a Picture
Follow the steps below to take a picture:
- Flip the shutter knob all the way to the end.
- Please note that pressing halfway sets the camera on autofocus mode.
Safety Warnings
Follow these safety warnings to use the equipment as required. The safety warnings help to prevent injury or harm to the user.
- To avoid leakage, excessive heating, and explosions, do not use batteries or power sources that are not specified for this camera. Make sure to use the appliances specified for this brand of camera.
- Do not short-circuit, disassemble, or expose the battery to fire or water. Also, do not expose the battery to the elements.
- Do not operate the charger with a damaged plug.
- Never leave the camera in a place with excessive heat or strong magnetic field. This may damage the battery.
References
Busch, D. (2011). David Busch’s compact field guide for the Canon EOS Rebel T3/1100D. Boston, MA: Cengage Learning PTR.
Guncheon, M. (2011). Magic lantern Guides: Canon EOS Rebel T3i (EOS 600D)/ T3 (EOS 1100D). New York: Pixiq.
Taylor, D. (2011). Canon Rebel T3/EOS 1100D: The expanded guide. Lewes: Ammonite Press.