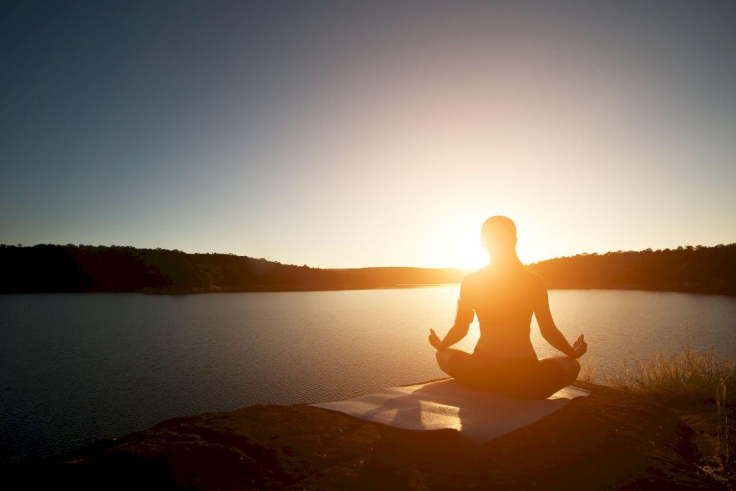
Undoubtedly, physical exercise is an indispensable part of any person’s life. This is uniquely true for students who often find themselves desk-bound. It can be challenging to find the space to go for a jog or hit the gym when you are maneuvering multiple classes and piles of homework. This is why we recommend students try yoga.

You don’t even need to leave the house to engage in this activity! Even 5-10 minutes of yoga daily is enough to make you feel stronger. It has incredible advantages for your brain as well.
In this article, our team covers all a busy student needs to know about yoga. You will discover the value yoga has for your mental development and health. Also, learn some of the easiest asanas that can help you study.
🧠 Can Yoga Really Affect Your Mind?
It is no secret that physical activity is valuable not just for your body but also for your brain. From saturating your blood with oxygen to the betterment of your mood, the benefits of exercise for your mental health are immense. Yoga, arguably, offers even more positive impacts on our minds.

If you want to study this topic in more detail, feel free to browse free college essays on our website. There are many studies that look at the effects of yoga on the human brain:
Studies on Yoga and the Brain
- Yoga Effects on Brain Health: A Systematic Review of the Current Literature | Neha P. Gothe et al., PubMed Central
- Yoga for Stress and Mental Health | Southern Methodist University, ClinicalTrials.gov
- A Pilot Study of a Randomized Controlled Trial of Yoga as an Intervention for PTSD Symptoms in Women | Karen S. Mitchell et al., Journal of Traumatic Stress
- Kundalini Yoga & Healthy Neurological Aging | Lady Davis Institute, ClinicalTrials.gov
- How Body Awareness Promotes Mental Health During Yoga and Physical Exercise | Massachusetts General Hospital, ClinicalTrials.gov
- Effectiveness of a School-Based Yoga Program on Adolescent Mental Health and School Performance | Jennifer L. Frank et al., Springer
- Evidence Map of Yoga for Depression, Anxiety, and Posttraumatic Stress Disorder | Wei Duan-Porter et al., PubMed Central
- Experts Review Evidence Yoga Is Good for the Brain | ScienceDaily
6 Benefits of Yoga for the Brain
Usually, when we think about the benefits of yoga for the brain, we remember meditation first and foremost. Just 10 minutes of meditation daily can help significantly lower your stress levels and improve your memory.

However, regular yoga practice will be just as valuable for you. Below, we have listed all the advantages of this exercise.
- Improved cognition. Studies reveal that people practicing it have more developed brain regions responsible for memory and learning. In the long run, it also slows down age-related cognitive pathologies, such as dementia and Alzheimer’s.
- Enhanced concentration. Try doing yoga 20 minutes before your study session (or doing a study break). You might notice that it increases your concentration. The physical activity enables better blood circulation from the body to the brain, allowing for better cell growth.
- Upgraded memory. During physical exercise, the body creates a protein that benefits the area of your brain responsible for remembering things. Research has shown that yoga practitioners have a statistically significant increase in memory retention. Your problem-solving skills are also boosted after a workout.
- Increased gray matter density. Gray matter is responsible for the brain functions, such as memory and learning. People’s general intelligence is associated with their volume of gray matter. Constant practice of yoga increases its density, thereby also increasing focus, emotional control, and self-awareness.
- Reduced stress. As you conduct your yoga practice, your brain will release a bunch of chemicals responsible for lowering anxiety and stress levels. These include oxytocin, serotonin, endorphins, and dopamine. These happiness hormones allow you to feel more content, make you more confident in yourself, and reduce tension.
- Shifted brain chemistry. Yoga has the potential to change our brain chemistry and make us happier in the long term. People who practice regularly have less gray matter decline, especially in the areas concerned with joy and contentment. Yoga also promotes activity in the regions of the brain linked with empathy, kindness, and gratitude.
💖 Reasons Why Students Should Try Yoga
Here are key reasons why yoga is the perfect exercise for busy and tired students:

It Doesn’t Take Much Time
The optimum amount of yoga necessary to receive its advantages is unique for everyone. However, according to research, most people report a benefit after practicing yoga once or twice every seven days for 10 to 24 weeks. This means that yoga is ideal for individuals who lack free time and need to practice on their own at home and according to their schedule.
Yoga Improves Your Mood
Frequent yoga practice reduces the prevalence of depression, boosts serotonin levels, and decreases the amount of protein that breaks down neurotransmitters. Undertaking yoga just before studying will put you in a good mindset for learning.
You Stop Suffering from Eye Strain
Yoga helps you divert your eyes away from devices. This is great for college students who spend the majority of their time studying and staring at their computers. The best break is not a movie or a TV show; your eyes deserve rest to maintain good health and avoid brain fog. Thus, yoga and exercise are recommended.
Your Grades Are Likely to Improve
According to studies, students who do yoga every day are more likely to succeed in school tests and examinations. So, try to include practicing asanas in your schedule. Better yet, incorporate it into your daily routine to optimize your grades and college experience.
You Will Sleep Better
Insomnia is a student’s enemy as it has been linked to hypertension, obesity, and poor academic performance, among other health problems. Integrating yoga into your study breaks improves your sleep quality.

Motivation Will Return to You
Exercising boosts productivity levels, especially when it serves as a study break. Yoga can also help you get motivated by removing stress-causing chemicals. It does not require sophisticated equipment or a large amount of room. So, you can do it anytime, in the comfort of your home.
📝 What You Need for Yoga: Checklist
Now that you discovered all the positive effects of yoga and see how manageable it is for students, don’t you want to try it? We thought so! Or we hope you at least consider it. Here is what you will need to start:
- Decide on the genre of yoga.
There are plenty of diverse practices that you can partake in. So, decide which one to focus on. The most widely practiced genres include Ashtanga, Vinyasa, Iyengar, Kundalini, Hatha, and hot yoga. - Select the setting.
You will need a dedicated space for your exercise. It can be a typical gym, a specialized yoga studio, or even a free area at home. - Get the required supplies.
A yoga mat is a vital instrument for any practice. You may also purchase additional supplies, such as blocks or bolsters. - Prepare fitting yoga clothes.
Wear whatever you will be completely comfortable in. Your bottoms should be easy to move around in, and your top should be well-fitting so you don’t get tangled up. - Review what asanas exist.
Whether you attend an in-person or an internet class, preliminary study of some of the poses is a good idea. This way, you won’t be at an absolute loss.
🎬 Yoga at Home – How to Start
You might need a bit of mental preparation before going to your introductory yoga class. However, surrounded by other newcomers and with a professional in charge, you won’t have trouble letting yourself go and appreciating the process.
If you’ve decided to roll out your yoga mat in your room, you might need a few tips on starting. So, see a list of tricks that will set your brain up for this unusual activity.

- Find a good spot for yoga. To start, simply find a place where you can practice. It should be an area where you have enough space to move around safely and without constraints. You can clear up a spot in your room, find a quiet corner in your house, or even go out in the garden. Whatever place you choose, ensure your peace will not be disturbed there.
- Plan a daily or weekly practice schedule. Setting realistic expectations for yourself is essential. Don’t burn yourself out by aiming to do several hours of yoga every single day. Instead, think about your limits. Decide how long your practice will be, when you’ll do it, and how long it will last. Try to be as consistent as possible with your training.
- Turn on an online yoga class. Even if you are a seasoned practitioner, joining a class might be a good idea. After all, the point of yoga is to allow both your mind and your body to relax. If you constantly wonder what pose comes next, your brain is working overtime. Otherwise, when you follow the flow of your yoga teacher, you can turn off your mind and focus on the sensations.
- Try to be still. In today’s fast-paced world, many people can’t sit still, even for a minute. Yoga challenges us to find peace at the moment. Don’t give in to the urge to try the most complex yoga routines all at once. Instead, start with the most basic exercise – stay still.
- Start with simple poses. There is no shame in beginner-level yoga, especially if you are just starting. Even if you have been practicing for a while, it can be good to return to the basics. Besides, the essential thing here is to build a habit of actually doing yoga and acquire a bit of muscle and flexibility. Once this activity has become a part of your life, you can move on to more complicated poses.
- Pay attention to breathing. You have probably heard how breathing is a part of any yoga practice. There are plenty of different exercises that you can attempt, from Simha Pranayama (Lion’s Breath) to Nadi Shodhana (Alternate Nostril Breathing). However, the technique is not as crucial as learning awareness. Begin by noticing the exhales and inhales. Soon enough, you will figure out how to move with your breath.
- Once you’re confident, experiment! When you have built up enough strength and confidence, allow yourself to go deeper with your yoga. Try out new styles, experiment with different routines, and test breathing techniques. Naturally, don’t push yourself too hard – you don’t want to throw your back out during practice!
🧘 Top 12 Easiest Yoga Asanas for Your Brain
We’ve talked plenty about the benefits of yoga for students. Nonetheless, you might question what exercises exactly will be the most useful when you’re tired from courses or studying for finals. We have an answer!

Below, you will see beneficial asanas for everyone. Though gathered and explained for beginners, the difficulty level will increase as you scroll down the page.
Corpse Pose (Savasana)
The Corpse Pose is a restorative asana, often done at the end of a yoga practice. Its benefits include reducing stress, fatigue, and tension. It helps improve concentration and relax after a long day.
If you have any injuries or medical conditions that might be aggravated by lying on your back, you should skip this pose.
How to Do the Pose
- Start by lying on your back with your feet hip-width apart and your arms at your sides.
- Close your eyes and take a few deep breaths.
- Allow your whole body to relax, letting go of any tension you may be holding.
- Stay in this position for 5-10 minutes.
Diamond Pose (Vajrasana)
Vajrasana, or the Diamond Pose, is an uncomplicated yet efficient pose that can be carried out any time. It assists with improving digestion, alleviating back pain, and stretching the thighs and ankles. Vajrasana is also a quality position for meditation. Thus, if you’re looking to still your brain, attempt the Diamond Pose.
Be sure stay away from this pose if you’ve got knee injuries or pain.
How to Do the Pose
- Position yourself on your heels with knees bent and your hips resting on your heels.
- Bring your hands to your upper legs.
- Sit up tall, lengthening through the crown of your head.
- You can stay in this posture for as much as you like.
Lotus Pose (Padmasana)
The Lotus Pose is a timeless asana with numerous rewards. It helps stretch the knee and hip joints and relieve lower back pain. However, this position is not fit for everybody.
If you are pregnant or have knee damage, you should steer away from this pose.
How to Do the Pose
- Get down on the ground with your legs in front of you.
- Bend one of your knees and bring your foot up to rest on the opposite thigh.
- Repeat on the other side.
- Once both feet are in position, place your hands on your knees, palms up.
- Take deep breaths and relax into the pose.
- Stay as long as you like.
Child’s Pose (Balasana)
The Child’s Pose is another restorative asana that can provide solace from study stress and exhaustion. It is also worthwhile for people with pain, as it stretches your muscles in the back and hips.
Be cautious with this pose if you have leg injuries.
How to Do the Pose
- Get on your heels with the knees hip-width apart.
- Slowly lean forward and place your forehead on your mat/the ground.
- Reach your arms in front of you.
- Keep the palms flat on the floor.
- For the final step, relax into the pose and breathe deeply.
- You can be in this pose for however long. When you’re ready, press up to sitting.
Downward-Facing Dog (Adho Mukha Svanasana)
The Downward-Facing Dog is a staple pose when you want a respite from exercise or sitting. It helps lengthen and stretch your spine, as well as the calves, hamstrings, and Achilles tendons. It can also lessen tension headaches and fatigue.
Skip this pose if you suffer from any injuries or conditions affecting the wrists (such as carpal tunnel), hands, or shoulders. Or you can modify it with the help of a teacher.
How to Do the Pose
- Get into tabletop position.
- Place your wrists directly under your shoulders and your knees under your hips.
- Spread your fingers wide and push down through your palms.
- Tuck your toes.
- Lift your hips up and back, coming into an inverted “V” shape.
- Slightly bend your knees if you need to avoid straining your hamstrings.
- Take 3-5 deep breaths and return to all fours.
Cat Pose (Marjaryasana)
The Cat Pose (also known as Cat-Cow) is a popular asana that lets you mitigate body tension and stretch out the spine. It can be beneficial for those who frequently experience back pain. Also, those who spend hours seated or standing. The pose is also said to assist in bettering digestion and getting rid of stress.
People with back, shoulders, or neck injuries should skip the Cat Pose. Pregnant individuals should also be vigilant with this one.
How to Do the Pose
- Start in a tabletop pose with your wrists under your shoulders, your knees under your hips.
- As you inhale, arch your back and look up.
- When exhaling, round your back and tuck your chin towards the chest.
- Repeat a few times, staying in each pose for at least fifteen seconds.
Bridge Pose (Setu Bandha Sarvangasana)
The Bridge Pose is a valid method to open up the area of the shoulders and chest. This asana can assist you in relieving anxiety and tiredness.
If you have any injuries or medical conditions that affect the back or neck, you should avoid this pose.
How to Do the Pose
- Get onto your back, bend your knees, place your feet flat on the mat.
- Keep your arms at your sides, closer to your body, palms flat.
- Slowly lift your hips off the ground, using your limbs for support.
- Go vertebra by vertebra, lifting your back off the yoga mat.
- Remain in this pose for a couple deep breaths, then come back down.
- Repeat it a few times, extending the time you spend in the Bridge Pose.
Humming Bee Breathing (Bhramari Pranayama)
The Humming Bee Breathing is a useful yoga exercise, which can be done anytime. This asana is perfect for reducing strain and promoting mental repose. It can also help clear sinuses and mitigate headaches.
Remember to skip this pose if you are pregnant or have hypertension. If you suffer from severe injuries or health conditions, consult your doctors before doing this pose.
How to Do the Pose
- Straighten your back and sir down, closing your eyes.
- Cover your earlobes with your thumbs and your eyebrows with your index fingers. Alternatively, press on the cartilage between your cheeks and ears.
- Deeply breathe in through your nose.
- Release the air through your lips as you make a “bee” sound (buzzing).
- Do this several times.
Tree Pose (Vrikshasana)
A bit more advanced, the Tree Pose is a phenomenal technique to improve your balance and plasticity. Not only can it affect your physical stability, but it regulates your emotions, making you mentally stable. And it can be done practically anywhere!
Avoid this yoga pose if you have any injuries or pain in your ankles, back, or knees. Also, be careful with this asana when you’re dizzy.
How to Do the Pose
- Get into Mountain Pose (standing tall, feet close together).
- Slowly lift your right foot, keeping it bent at the knee.
- Gently place it on your left thigh. If this is too much, you can place it on your left calf.
- Keep your hips squared and your left leg straight.
- Either raise your arms overhead or bring your palms together at the chest.
- Keep your gaze steady and breathe deeply.
- To take it a step further, you might consider closing your eyes.
- Lower your arms and leg. Repeat on the other side.
Standing Forward Fold Pose (Uttanasana)
The Standing Forward Fold is perfect for stretching your body. In particular, your hamstrings, back, and shoulders. It’s also a solid way to calm your thoughts and release anxiety.
If you have any low-back pain or injuries in your legs, you should skip this pose.
How to Do the Pose
- Get up with your legs hip-width apart.
- Slowly fold forward at the hips, allow your arms to rest at your sides.
- You can keep your knees slightly bent.
- For a deeper stretch, straighten your legs and keep fingertips on the mat.
- Try to place your palms on the floor if you’re flexible enough.
- Stay for at least half a minute.
Shoulder Stand (Salamba Sarvangasana)
The Shoulder Stand is a fantastic move for improving blood circulation and stimulating the thyroid. It can relieve fatigue and tension headaches, making you more attentive and alert.
This pose should be avoided if you have high blood pressure, glaucoma, or a detached retina.
How to Do the Pose
- Position yourself on your back with your legs extended.
- Slowly uplift your legs towards the ceiling, getting them perpendicular to the floor.
- Place your palms under your lower back for support.
- Use your abdominal muscles to elevate your hips slowly.
- Align your hips with your shoulders and ensure your upper body is perpendicular to the floor. Then, hold the pose 30-60 seconds.
- Once finished, delicately lower your legs to the starting position.
Plow Pose (Halasana)
The Plow Pose is often encouraged when you need to reduce tiredness. It also boosts digestion and increases flexibility in the spine.
While the Plow Pose is generally safe for most people, those with neck injuries should steer clear of this asana. Beginners may want to avoid it, as it requires plenty of flexibility and balance.
How to Do the Pose
- Extend your legs and lie on your back.
- Inhale and raise your legs until they are at 90 degrees to the ground.
- Exhale through your nose and steadily descend your legs over your head until they reach the mat.
- If your toes do not touch the ground, you can set a block under your lower back for stability.
- Remain this position for as long as you can, focusing on your breath.
- Gradually roll your spine back onto the floor one vertebra at a time.
🎓 9 Best Yoga Poses for Students: Infographic

Thank you for reading the article! We hope you see how easy yet helpful yoga can be and try a couple of asanas during a study break. If your friends may also be interested in improving their academic performance or overall cognition, send them this page.
🔗 References
- Yoga for Better Mental Health – Harvard Health, Harvard Medical School
- How Yoga Changes Your Brain – Yoga Medicine
- Why Yoga Is Good for Your Body and Brain – Jaylissa Zheng, Dacher Keltner, Greater Good Medicine, Berkeley
- Peace of Mind: How Yoga Changes the Brain – Nicola Williams, News Medical
- Yoga and the Brain – Psychology Today
- What Yoga Does to Your Brain – Jessica Migala, NBC News
- 7 of the Best Yoga Poses for Stress Management When in College – Saint Leo University
- 7 Simple Steps to Start a Home Yoga Practice – Yoga Basics
- How to Get Started with Yoga – Laura Williams, VeryWell Fit
![Positive Thinking and How to Practice it [Infographics]](https://ivypanda.com/blog/wp-content/uploads/2022/03/positive-thinking-happiness-lifestyle-concept-309x208.jpg)

![Traveling as a Student [Guide + Infographic]](https://ivypanda.com/blog/wp-content/uploads/2021/10/traveler-asian-woman-spending-holiday-trip-ayutthaya-thailand-309x208.jpg)